7 min to read
고군분투 Ubuntu Machine Learning 구축하기, Chapter1
이 글은 Ubuntu 설치가 완료되었다는 가정하에, 그래픽 드라이버부터 Machine Learning 서버 구축을 설명하는 글입니다. 아직 Ubuntu 설치가 완료되지 않은 분은 아래의 링크를 참고하시면 좋을꺼 같습니다.
Ubuntu가 설치가 완료되었다면 미러 서버를 카카오로 바꾸고, 밀린 업데이트를 해야 합니다.
1. Change Mirror Server
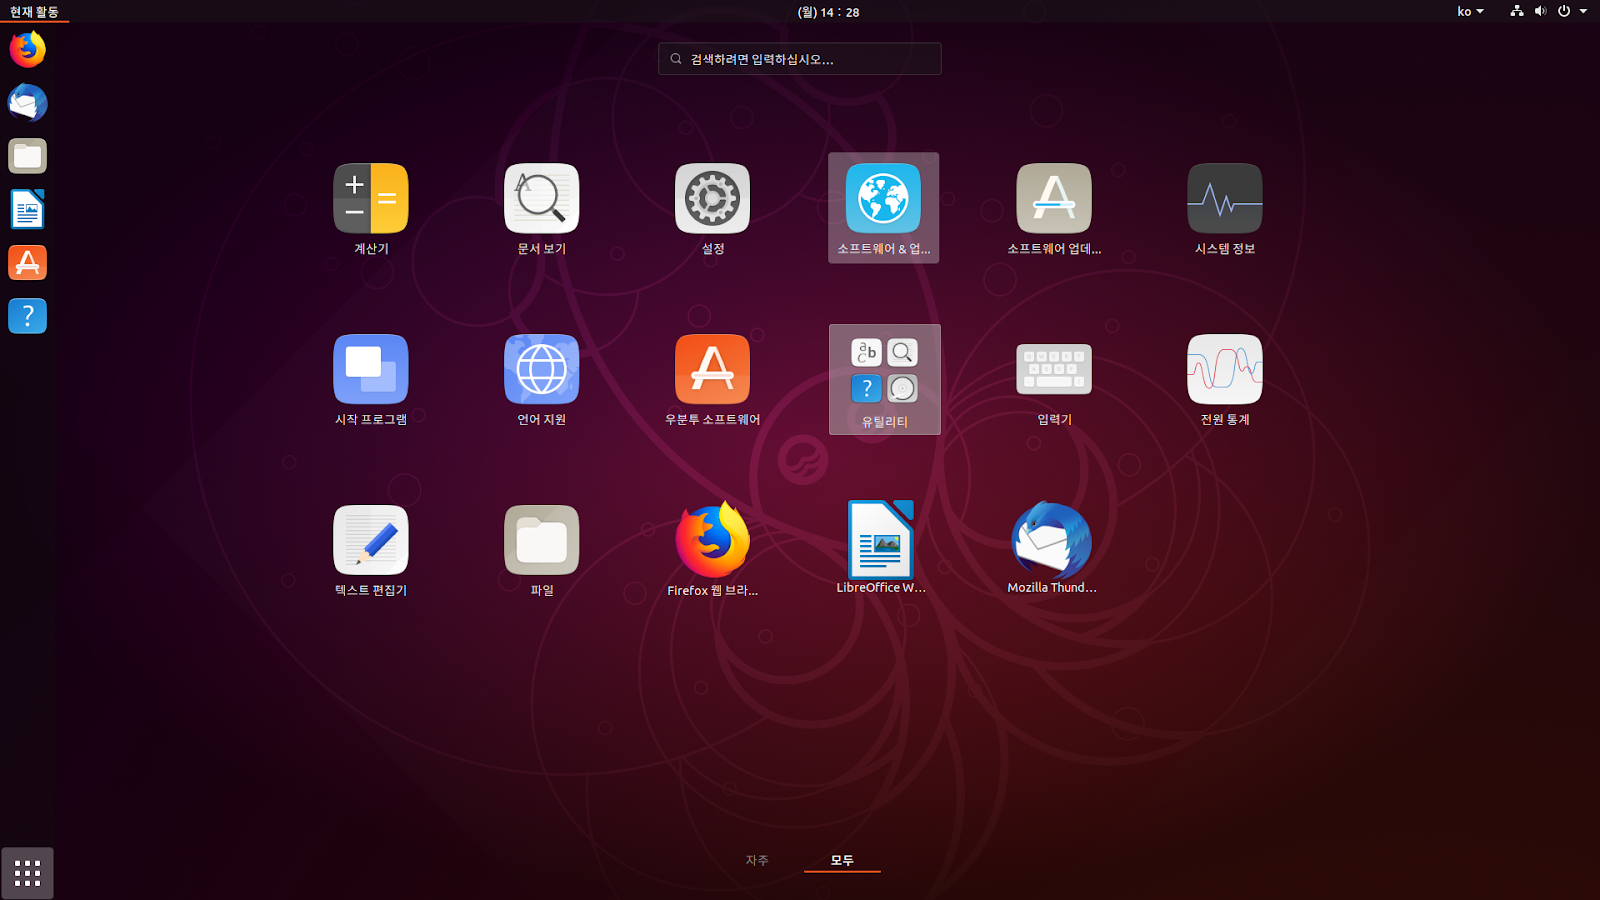
화면에서 하늘색 아이콘 소프트웨어&업데이트를 눌러주세요.
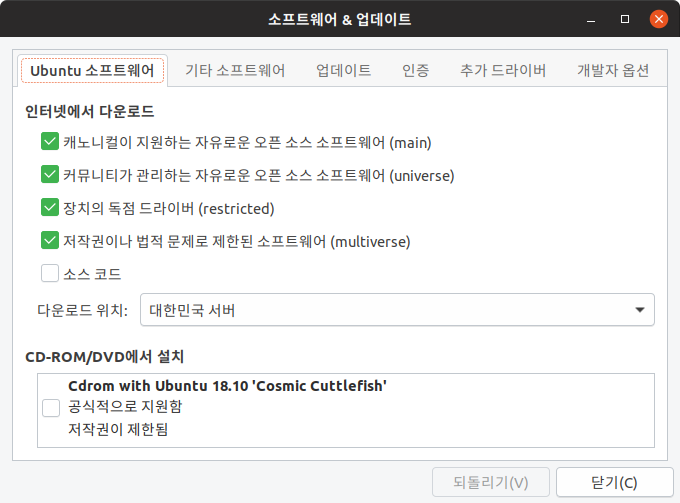
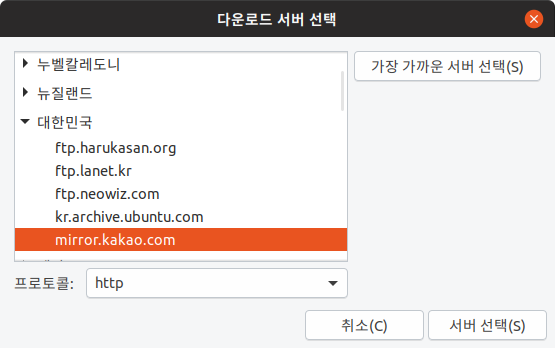
여러 서버가 있을텐데 현재 한국에서는 카카오 서버가 가장 빠르고 안정적이니 카카오 서버를 클릭하고, 서버 선택을 눌러주세요.
2. Update and Upgrade
sudo apt update
sudo apt upgrade
sudo apt autoremove --purge

# vim 설치
sudo apt-get install vim
3. Checking and Removing a Nouveau Installation
nouveau는 Ubuntu 기본 그래픽 드라이버이며, NVIDIA 정식 드라이버 설치를 위해선 삭제가 필요합니다. 아래 명령어 실행 후 1줄이상 출력되면 nouveau가 설치된 환경입니다.
# nouveau가 설치되었는지 확인
lsmod | grep nouveau

# blacklist 파일 추가를 위해 vim으로 열어줍니다.
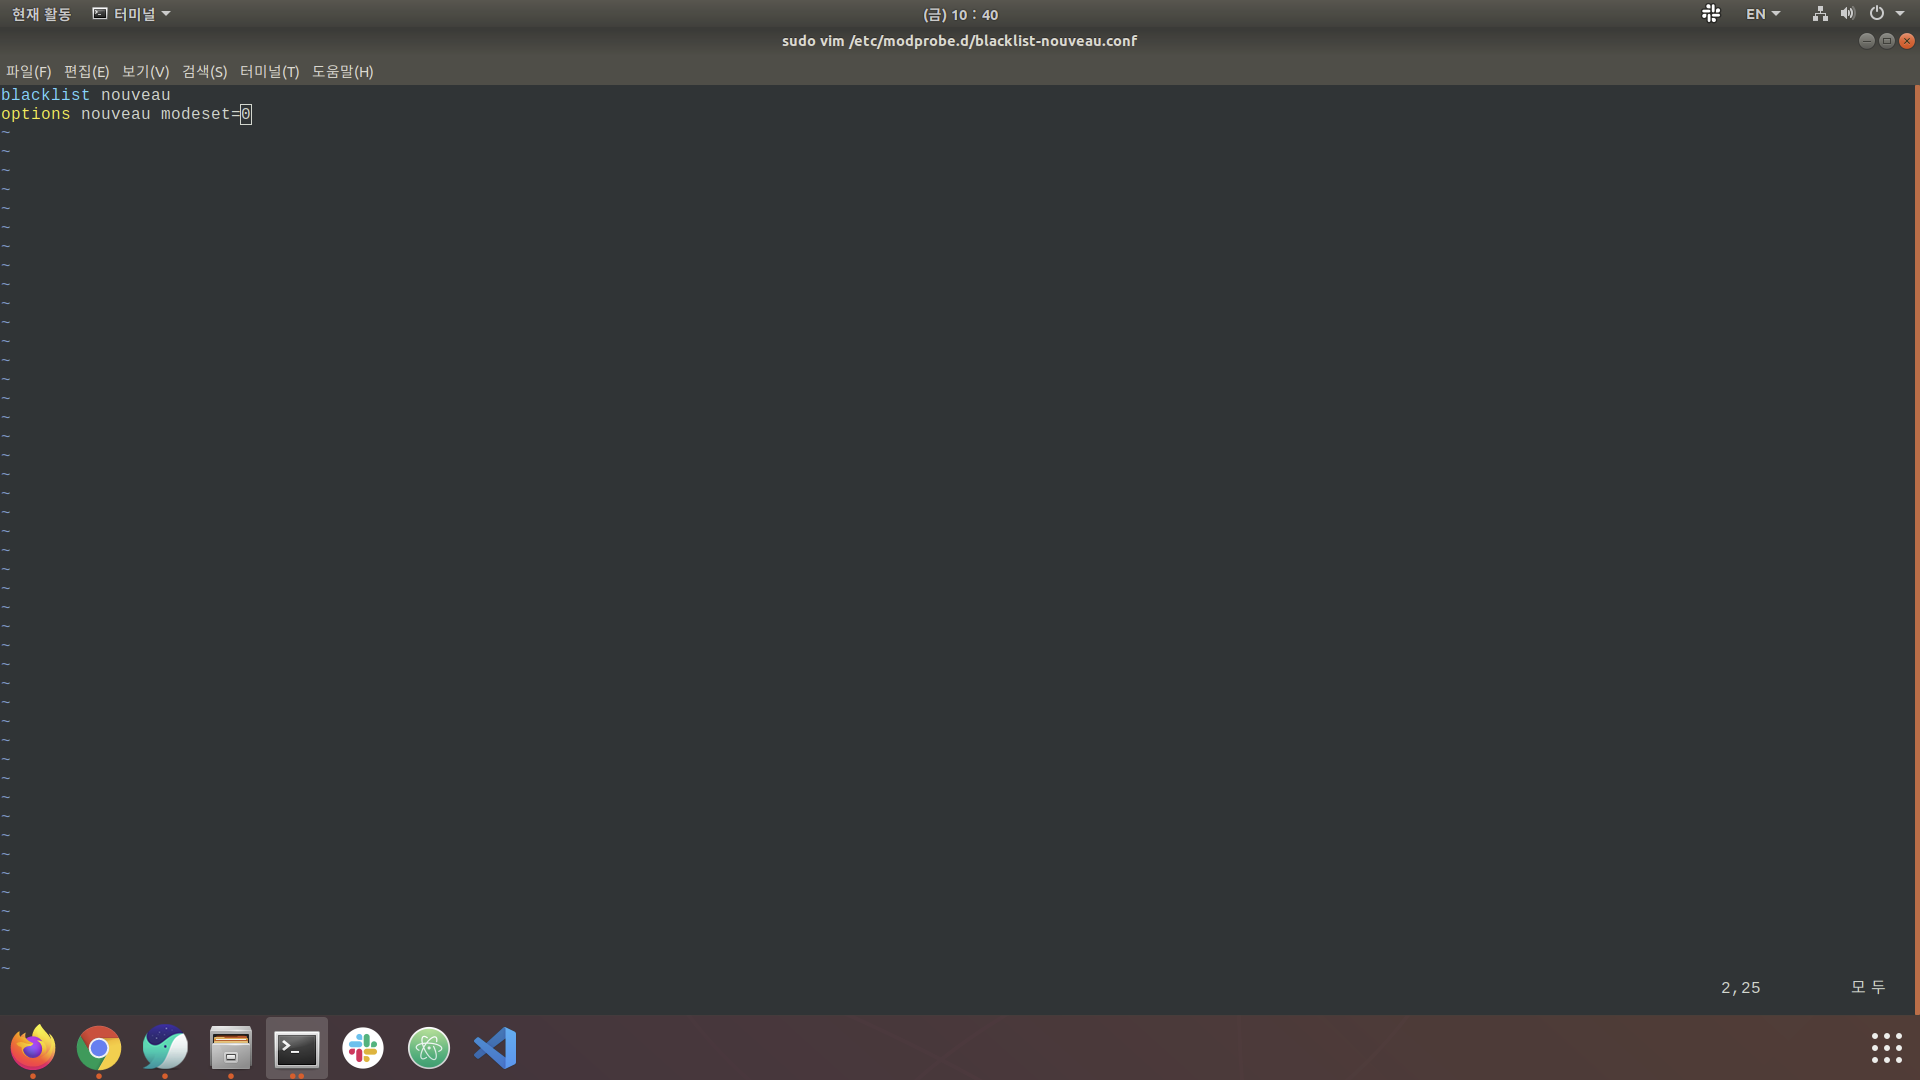
sudo vim /etc/modprobe.d/blacklist-nouveau.conf
아래의 텍스트를 입력하면, 이후 nouveau는 무시됩니다.
blacklist nouveau
options nouveau modset=0
# 아래의 명령어 입력 후 재부팅
sudo update-initramfs -u
sudo reboot now
재부팅을 하게 되면 그래픽 드라이버가 없는 상태이기 때문에 화면의 해상도가 달라지거나, 멈춤 현상이 생길 수 있습니다. 추가로 vim에 대해 더 자세히 알고 싶은 분은 아래를 참고하시면 좋을꺼 같습니다.
4. Before Driver install, Clean Up
혹시 기존의 드라이버나 CUDA가 잘못 깔린 상태라면, 아래의 명령어를 통해 꺠끗히 제거해주세요.
sudo apt-get purge nvidia*
sudo apt-get autoremove
sudo apt-get autoclean
sudo rm -rf /usr/local/cuda*
sudo reboot now
5. Install NVIDIA-driver
먼저 자신의 드라이버가 어떤 것이 필요한지를 NVIDIA 공식 드라이버를 통해 확인합니다.
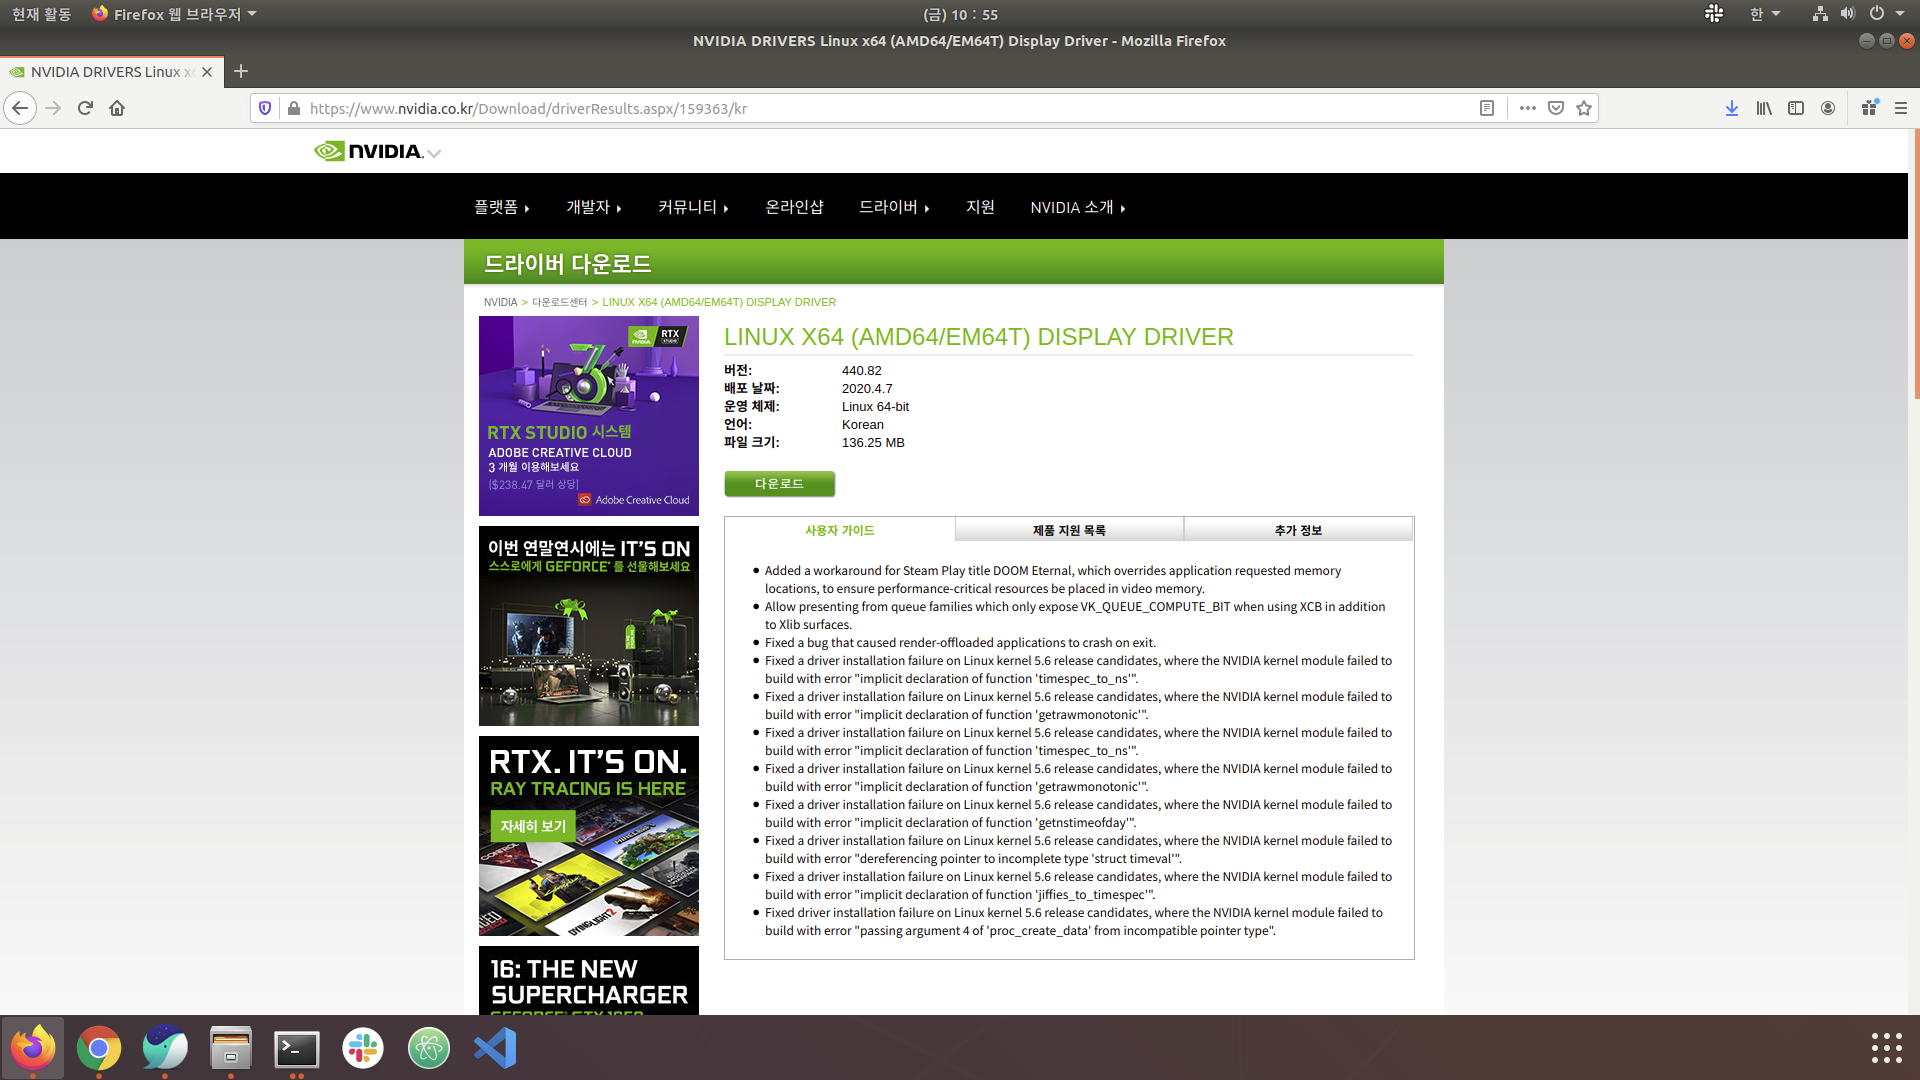
저의 경우는 RTX2070 Super을 사용하며, 제공되는 드라이버의 버전이 440.82입니다.
드라이버 설치를 위해서 많은 블로그에서 PPA를 통하여 추천되는 드라이버를 설치하는 방법을 소개합니다.
저도 처음에는 아래의 명령어로 같이 PPA를 통하여 추천되는 드라이버를 설치하였습니다.
ubuntu-drivers devices
sudo add-apt-repository ppa:graphics-drivers/ppa
sudo apt update
sudo ubuntu-drivers autoinstall
하지만 설치가 완료된 후에 살펴보니 이상여부를 떠나, 여기에는 치명적인 단점이 있습니다.
추천되는 드라이버가 440버전이라 위의 제공되는 버전과 잘 맞게 440.82버전이 설치될 줄 알았습니다.
하지만 PPA를 통하여 설치하였을때, 440.64의 버전이 설치되었습니다.
440.82버전을 설치하고 싶은 욕심에 다른 방법을 찾아보게 되었습니다.
바로 공식 TensorFlow 홈페이지에서 해결할 수 있었습니다. TensorFlow 홈페이지에서는 NVIDIA 드라이버에서부터 CUDA 설치까지 명령어를 제공해줍니다. 하지만 저는 CUDA 설치의 경우, 의존성 문제로 설치가 되지 않았습니다.
GPU 지원 TensorFlow에 들어가보시면, 아래와 같은 명령어들이 제공됩니다.
# Add NVIDIA package repositories
wget https://developer.download.nvidia.com/compute/cuda/repos/ubuntu1804/x86_64/cuda-repo-ubuntu1804_10.1.243-1_amd64.deb
sudo dpkg -i cuda-repo-ubuntu1804_10.1.243-1_amd64.deb
sudo apt-key adv --fetch-keys https://developer.download.nvidia.com/compute/cuda/repos/ubuntu1804/x86_64/7fa2af80.pub
sudo apt-get update
wget http://developer.download.nvidia.com/compute/machine-learning/repos/ubuntu1804/x86_64/nvidia-machine-learning-repo-ubuntu1804_1.0.0-1_amd64.deb
sudo apt install ./nvidia-machine-learning-repo-ubuntu1804_1.0.0-1_amd64.deb
sudo apt-get update

# Install NVIDIA driver
sudo apt-get install --no-install-recommends nvidia-driver-418

# Reboot. Check that GPUs are visible using the command: nvidia-smi
sudo reboot now
위의 명령어를 입력하고, nvidia-smi를 확인해본 결과입니다.
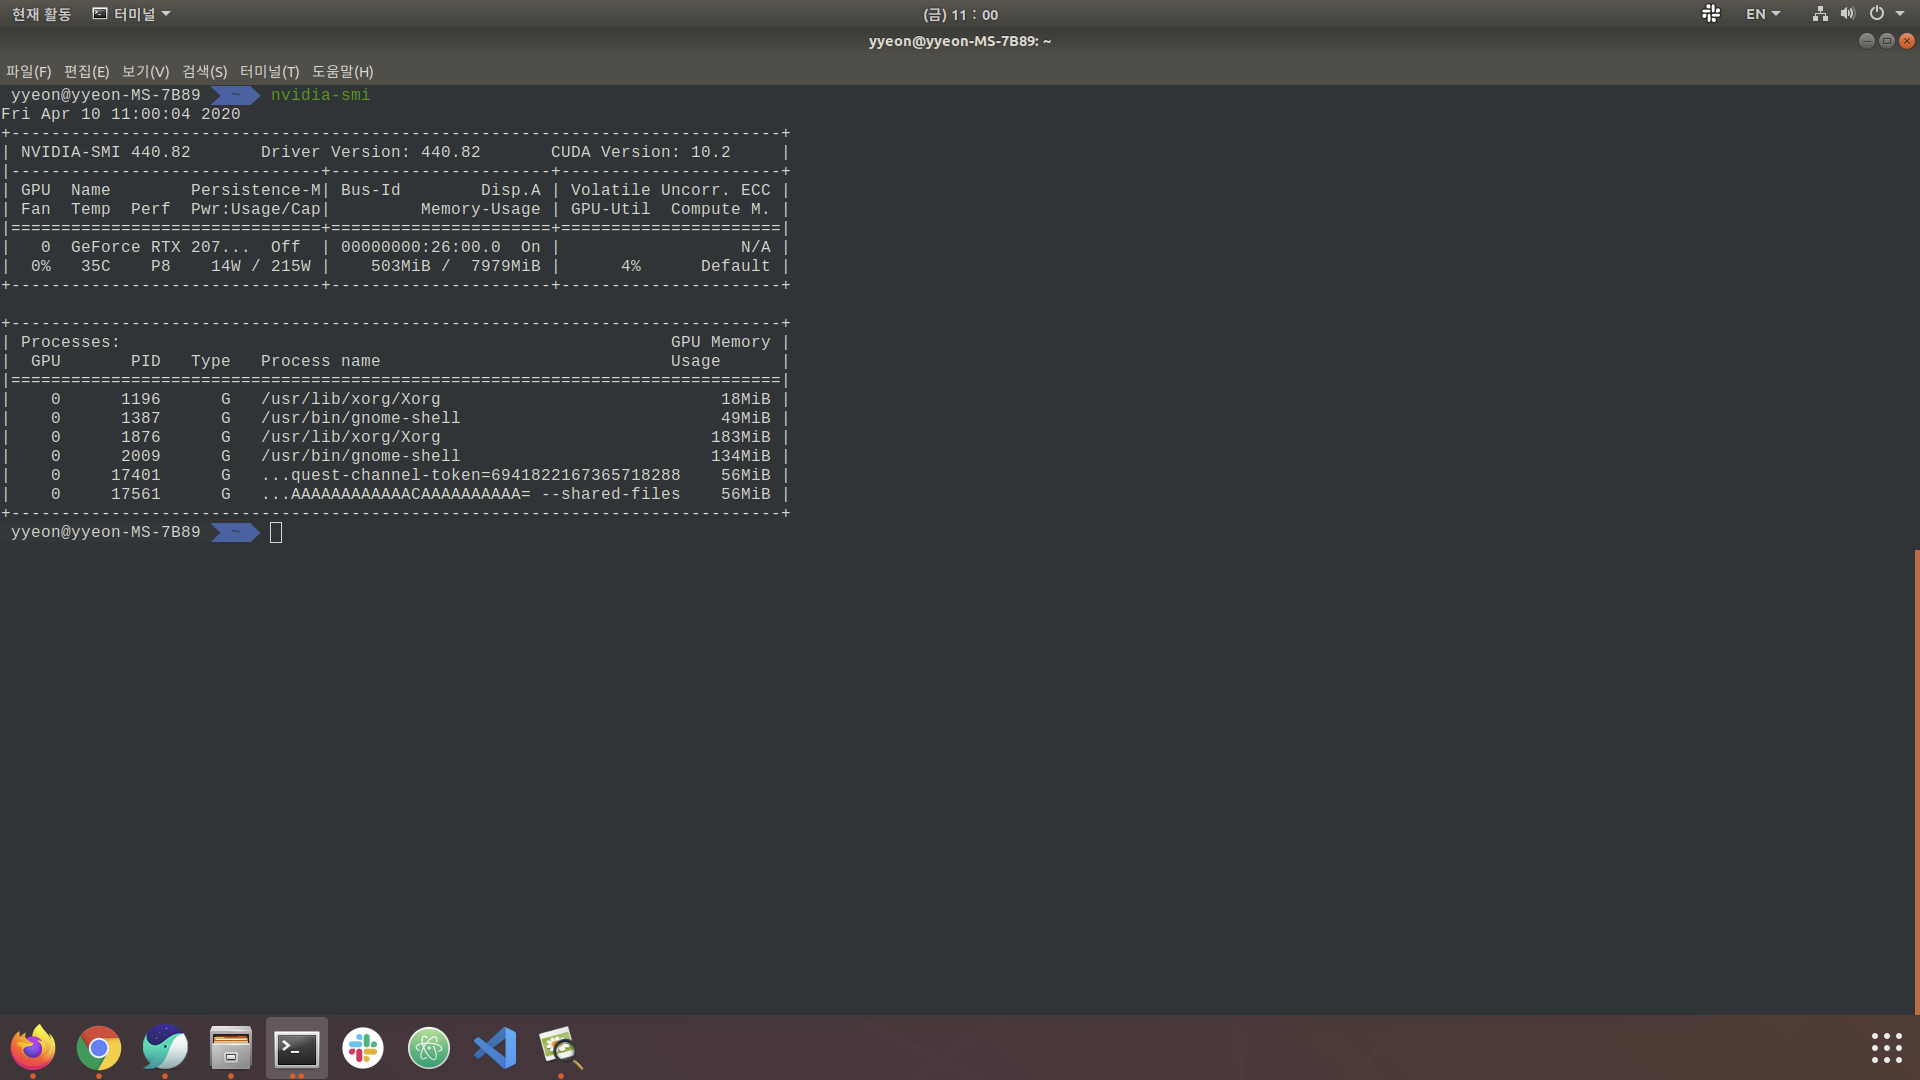
6. Install CUDA
그럼 이제 본격적인 CUDA를 설치해봅시다.
6.1 CUDA Dependency
CUDA 설치시, 다음과 같은 dependency를 항상 pull 해온다고 보장할 수 없기 때문에 미리 설치해두는 것이 좋습니다.
sudo apt-get update
sudo apt-get install build-essential dkms
sudo apt-get install freeglut3 freeglut3-dev libxi-dev libxmu-dev
6.2 Install CUDA 10.1
CUDA Toolkit 10.1 original Archive
위의 링크에서 다운받아도 되지만, 설치 시간이 매우 오래걸리기 때문에 아래의 명령어를 이용하는 방법을 추천합니다. 제 경우 공식 홈페이지에서 받았을떄는, 3~4시간 정도가 소요되었지만 아래의 명령어를 이용하였을 때는 10분만에 설치가 가능하였습니다.
sudo apt install sudo gnupg

sudo apt-key adv --fetch-keys "http://developer.download.nvidia.com/compute/cuda/repos/ubuntu1804/x86_64/7fa2af80.pub"

sudo sh -c 'echo "deb http://developer.download.nvidia.com/compute/cuda/repos/ubuntu1804/x86_64 /" > /etc/apt/sources.list.d/nvidia-cuda.list'

sudo sh -c 'echo "deb http://developer.download.nvidia.com/compute/machine-learning/repos/ubuntu1804/x86_64 /" > /etc/apt/sources.list.d/nvidia-machine-learning.list'

sudo apt update

# sudo apt-get install cuda-<version> / version 입력이 없다면, 10-2 최신 version으로 설치 진행
sudo apt-get install cuda-10-1
6.3 CUDA 환경 변수 등록
sudo vim ~/.bashrc

# >>>CUDA
export PATH=$PATH:/usr/local/cuda/bin
export CUDADIR=/usr/local/cuda
export LD_LIBRARY_PATH=$LD_LIBRARY_PATH:/usr/local/cuda/lib64
# >>>CUDA


source ~/.bashrc
7. Install cuDNN
cuDNN은 Deep Neural Network 를 위한 GPU-accelerated library입니다. 딥러닝을 돌리실 분들은 필수로 설치해 주셔야합니다. cuDNN 설치파일을 다운로드 받기 위해서는 계정 로그인을 하셔야합니다. 링크로 가셔서 로그인 하시면, 버젼별로 지원하는 cuDNN을 받으실 수 있습니다.
다운로드를 받으실 때 아래와 같은 3가지의 Library가 있습니다.
- cuDNN Runtime Library for Ubuntu18.04 (Deb)
- cuDNN Developer Library for Ubuntu18.04 (Deb)
- cuDNN Code Samples and User Guide for Ubuntu18.04 (Deb)
단순히 딥러닝 library를 실행하기 위해서라면. Runtime library만 받으셔도 됩니다. 하지만, 샘플 예제를 돌려서 정상적으로 확인까지 하고 싶으신 분들은 나머지 두개를 다 받으시면 됩니다.
# 다운받은 경로로 이동
cd 다운로드

# Tab를 활용하세요.
sudo dpkg -i libcudnn7_7.6.5.32-1+cuda10.1_amd64.deb
sudo dpkg -i libcudnn7-dev_7.6.5.32-1+cuda10.1_amd64.deb
sudo dpkg -i libcudnn7-doc_7.6.5.32-1+cuda10.1_amd64.deb
설치 완료 후에는 잘 작동하는지, 샘플 예제로 확인을 하시면 됩니다.
cp -r /usr/src/cudnn_samples_v7/ $HOME
cd $HOME/cudnn_samples_v7/mnistCUDNN
make clean && make
./mnistCUDNN
정상적으로 작동한다면, Test passed! 라는 문구가 뜨게 됩니다.
이제 NVIDIA 드라이버와 CUDA, cuDNN까지 설치가 잘되었는지 확인을 해봅시다.
아래의 그림이 모두 뜨면, 성공적으로 설치가 된 것입니다.
# Nvidia
nvidia-smi

# CUDA
nvcc -V

# cuDNN
cat /usr/include/cudnn.h | grep -E "CUDNN_MAJOR|CUDNN_MINOR|CUDNN_PATCHLEVEL"
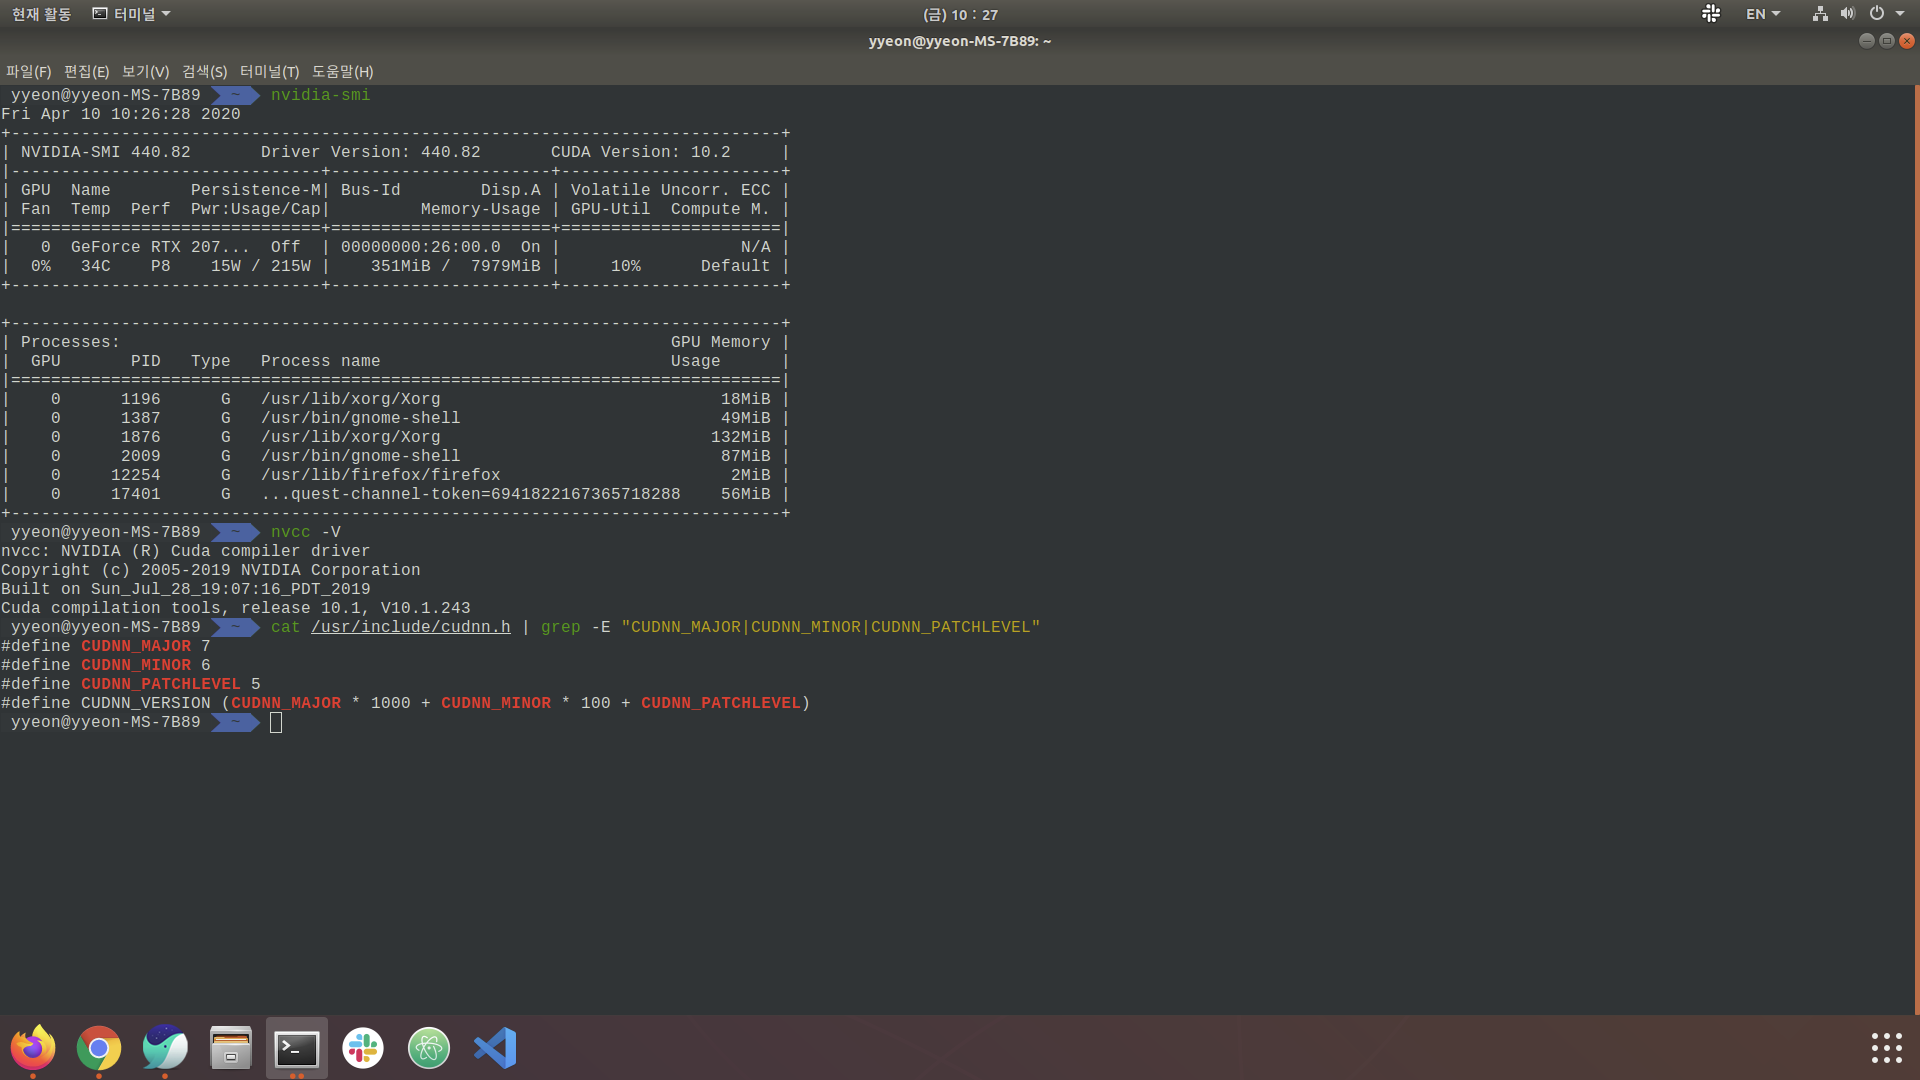
참고로 저 같은 경우는 nvidia-smi의 CUDA 버전과 nvcc -V 로 확인한 CUDA 버전에 차이가 있었습니다.
잘못 설치 되었는줄 알고, 왜 그런지 찾아봤더니 Stackoverflow에 아래와 같은 답변이 있었습니다.
CUDA has two main APIs: runtime API and driver API. There are versions for both (eg 8.0, 9.0, etc.). The necessary support for the driver API (such as libcuda.so on linux) is installed by the GPU driver installer. The support required for the runtime API (linux libcudart.so, nvcc, etc.) is installed by the CUDA toolkit installer (GPU driver installer may also be bundled). In any case, especially when installing GPU drivers separately from CUDA installation (ie CUDA toolkit), the driver API version (installed) may not always match the version of the runtime API (installed) not. The nvidia-smi tool is installed by the GPU driver installer. Normally, it is not installed by the CUDA toolkit installer, but the GPU driver is displayed. Recently (on Linux, driver versions between 410.48 and 410.73), NVIDIA forces decided to add a report of the CUDA driver API version installed by the driver to the nvidia smi output. This has nothing to do with the installed CUDA runtime version. Nvcc, the CUDA compiler driver tool installed with the CUDA toolkit, always reports the CUDA runtime version built to recognize it. It doesn’t know what driver version is installed or even if a GPU driver is installed. Therefore, by design, these two numbers do not necessarily match. Because it reflects two different things.
요약 하자면 NVIDIA driver와 CUDA를 따로 설치 하는 경우, 서로 reporting 하는 버전이 다를 수 있다는 것이고, 실제로 설치된 CUDA버전은 nvcc -V로 확인 한게 맞다는 것입니다.
또한 새롭게 알게 된 사실로, CUDA만 설치해도 자동적으로 NVIDIA driver를 설치해주는거 같습니다. 그리고 두 버전이 꼭 같아야 할 필요도 없다고 하니 가볍게 무시하시면 될 꺼 같습니다.
Next
다음 글들에서는 Anaconda와 Tensorflow, Pytorch등의 설치 방법들을 소개하는 것으로 포스팅하겠습니다.
고군분투 Ubuntu Machine Learning 구축하기, Chapter2
혹시 위의 방법대로 수행하였지만 오류가 있을 경우, 알려주시면 수정하겠습니다.
감사합니다.
Comments